


From Planning to Panel: The Complete Wire Pulling Workflow with @volts.tats.and.hardhats


Use Coupon Code “volts10” for 10% Off Your Next Rack-A-Tiers Order!
This is @volts.tats.and.hardhats and I am here to give you a rundown of the order of operations for pulling wire, all the way from deciding how much wire you need to pull and where, to wiring the actual panel. Let’s go.
Planning Your Pull
First, you need to figure out how many circuits are needed and in what areas of the job. For instance, if you have several offices, you need to look at which circuits and colour code those into the circuit numbers, you know, 1, 3, 5, red, black, blue, and then you can determine the size of conduit you’re going to run.
There are a bunch of conduit filling rules when it comes to the code, so you need to figure out how many circuits are in which area before you can decide on the size of pipe. You run the pipe, you fish it, and you string it. Then you set up your T90.
 I like to install my T90 on my Rack-A-Tiers E-Z Roll Wire Rack, in order of colour, with the wire coming from the underside of the coil. This is a personal preference for me, but I usually line up my wire from the underside, red, black, blue, white for the neutral, and green for the bond. On the job site, we always pull a green wire in each conduit, even though the conduit does act as a bond.
Get the E-Z Roll Wire Rack on Wheels
How to Get Smooth Wire Pulls
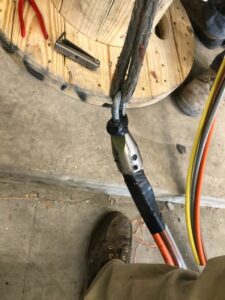 You’re going to write out your circuits and sets. For example, 135 and neutral, and typically, you pull one green wire on the first pull per pipe. Then you’re going to tie on a follow-through string. Tie on your wire with a triple hitch, tape it up, label it with white tape, and then you’re going to use lube, and you’re going to lube up your wires for easy pulling.
You pull your wire to the designated spots, and once it’s pulled, you’re going to measure off how much wire you need to get back to the panel. What I usually do is cut a piece of twine, and I measure that distance, so you don’t have to measure the wire each time. You just hold out the string, and you pull the wire to that length and snip. At this point, I like to wipe down the wire so it’s free of the slippery lube, and I like to re-label on the panel side with Ideal’s wire numbers.
Explore Our Cable Pulling Tools
Get Rack-A-Tiers Wire Labels & Markers
Keep Your Wires Organized
Organization is very important when you are pulling wire. Loose strings will be your nightmare, and messy wire arrangements will be the death of you. You want to make sure you coil up each individual set and keep them nice, hanging, ready for installation in the panel.
Wiring the Panel: Get the Cleanest Install
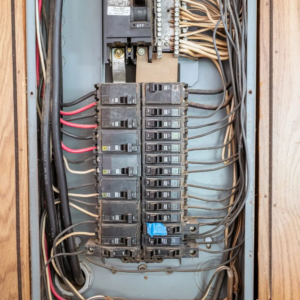 Once this is done, you’ll pull all of the sets from the last junction box first through your last piece of conduit into the panel. Then you start wiring it up. Odd numbers on the left side, even numbers on the right side. 1-3-5-7-9-11 on the left, 2-4-6-8-10-12 on the right. All the neutrals go together in the bottom of the panel on the neutral bar, and sometimes you have to install your own ground bar. I like to start with my bonds. I always land my bonds first, and then I do my neutrals. Get all the green and the white wires out of the way, label them, and then you can start with your colors.
Try to be consistent with the way you swoop and the way you land your wire into your breakers. Make sure to tighten the breaker screws tightly. I like to use a flathead screwdriver after my number 2 Robby for more torque.
Labeling Your Wires & Testing Breakers
Some people don’t label their neutrals. I do because then troubleshooting it’s easier to find which neutral is for which set. Once your panel is wired, go out into the field with a plug-in tester. Look at your drawing, turn on each breaker one at a time, and test each receptacle. Don’t forget to test the top and the bottom of each receptacle because sometimes that little tab can be broken inside the receptacle, and only half will work. At this point I label all my receptacles with a label maker for easy future troubleshooting. Make an updated panel schedule, and that’s that. Have fun!
Tool Recap: Tools You Need for Wire Pulls
Phase Tape Measure

This measuring tape is labeled with black, red, and blue numbers as a quick reference when working with multiple phases.
Penguin Puller
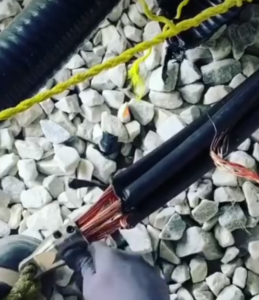 Attach your cables to the Penguin Puller, attach your rope and get pulling.
E-Z Roll
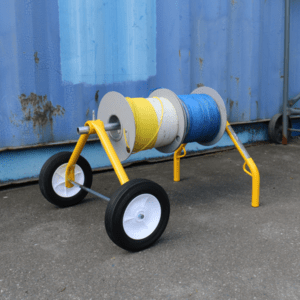 E-Z Roll is a wire dispenser on wheels that makes moving and pulling wire effortless. Load your spools once and wheel them wherever you need with no disassembly
Rack-A-Tiers Rough-In Bit Kit
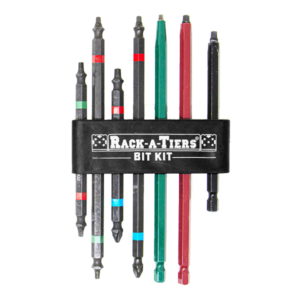 The Racky Bit Rough-In Kit features all the color-coded driver bits you need for roughing in a house or condo. Includes our popular double-ended impact bits.
Phase It Right Wire Labels
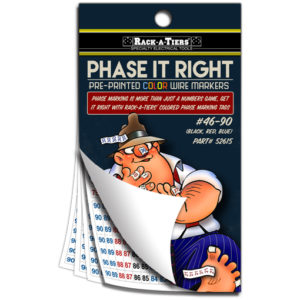 Phase marking is more than just a numbers game. Get it right with Rack-A-Tiers’ colored phase marking tags.

