





Home Electrical Upgrade 101: Temp Power to Panel Rough-In, with @volts.tats.and.hardhats (Part 1)


Use Coupon Code “volts10” for 10% Off Your Next Rack-A-Tiers Order!
Ever wondered what actually goes into a home electrical upgrade? @volts.tats.and.hardhats (aka Laura), a commercial electrician stepping into resi territory, wrote up her firsthand experience for us. Here’s Part 1 of her deep dive, straight from the field.
From Commercial to Resi
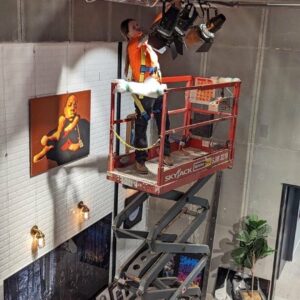 So, you wanna upgrade your home? Hey, I’m a 5th-year electrical apprentice and work on commercial sites, mostly working with 347/600V.
I’ve been trying to make myself more familiar with residential codes and the differences between them, so I put myself into some Resi sites lately! I decided, upon further experience and research, that I was ready to do a blog about it! Thanks for reading! Let’s get into it.
Sizing Up The Job
First, you need to determine the main factors of the job; all including but not limited to service size, panel/meter location, circuit count, and whether there are any dedicated loads. And make sure to check for smoke/CO detector locations/requirements.
Picking Your Service Size
Let’s talk about homes 🏠. 100A is typical for an older/smaller home. But 200A is now often more popular, making it equipped for more modern homes today.
Crunching the Load Calculations
Calculations needed: General lighting load, small appliance loads, HVAC, electric heat, dryer, range if on site. Is there a hot tub? Do the homeowners have an electric car requiring an EV charger? Don’t forget about A/C needs, and is the home finished with a basement suite? Can’t forget those loads.
Permits, ESA & Getting Powered Up
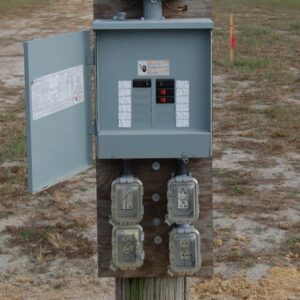 First, file ESA permits. Arrange inspections (Rough-in inspection and final inspection at a later date). Is temporary power setup needed? If so, you’ll need to install a temporary power pole or service. This type of service is used during construction for:
- Tools
- Lighting
- Chargers
- Temporary heat
Make sure to have a qualified person ensure proper grounding, weatherproofing where needed, GFCI protection, and that you install a lockable disconnect.
Gear up before you power up:
- Croc’s Needle Nose Wire Strippers – Strips AWG #10–22 and NMD sheathing, plus bolt cutting and crimping built in. One tool covers most of your temp power hookup needs.
- Rough-In Bit Kit – 7-piece color-coded driver bits, impact rated and built for daily jobsite abuse from temp power hookups through rough-in.
- Ultimate AC Sensor Voltage Tester – Confirm dead or live before touching anything. No-contact testing from 50–1000V AC with a continuous glow and audible alert.
Next Big Step: Bring the Service
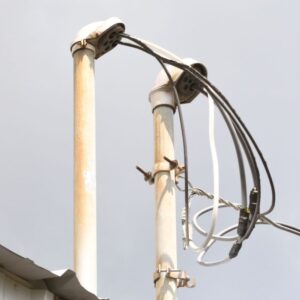 First, you need to ask yourself: Is it overhead or underground Service?
Then you can install:
- Mast (if overhead)
- Meter base
- Service conductors
- Grounding system
- Main disconnect/panel
Grounding & Bonding Install:
- Ground rods or grounding electrode
- Bonding conductor
- Water pipe bond
- Gas bond where required
Bend it, land it, cut it clean:
- Allen Head Driver Bit Kit – 6″ hex bits plus a 3/8″ socket adapter make quick work of landing lugs on your main disconnect.
- Hoppy Bender – Built-in stop and engraved multipliers deliver accurate, repeatable bends on your mast or service conduit run, no guesswork required.
- Carbide Tipped Hole Saw Kit – Six sizes of durable carbide-tooth saws for clean cuts into wood and drywall around the meter base and panel.
Building Out the Panel
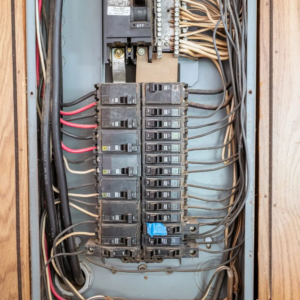 Main Panel
Typically, 200A Separate Lighting circuits, receptacle circuits, dedicated appliance circuits, HVAC, basement, garage, exterior (soffit pots, outdoor garden lights, etc.)
Layout
The following items need to be laid out, shot or plumbed with a laser, and have boxes mounted. Including switches, receptacles, lighting boxes, exterior lights, smoke detectors, and thermostats.
My experience is in commercial settings. Receptacles are typically 12-16” to center AFF switches, anywhere from 38”- 43” to center AFF. Those of you on a Resi site, are these the same heights you deal with? :)
Make sure you pay attention to code-compliant boxes based on the location. For example, weatherproof boxes, metal versus plastic, and so on.
Roughing In the Circuits
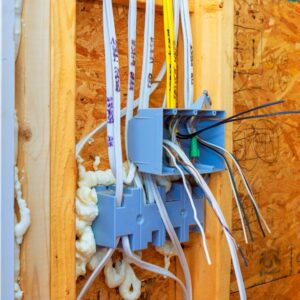 Now it’s time to run branch circuits. Examples of some Common Cable Sizes:
- 14/2:
- 15A lighting/receptacles
- 12/2:
- 20A circuits
- 10/3:
- Dryers
- 8/3 or 6/3:
- Ranges/subpanels
Keep the wire moving:
- Rack-A-Tiers 2.0 Wire Dispenser – Dispenses 34″ reels up to 300 lbs and doubles as a sawhorse or workbench, keeping branch circuit wire flowing smoothly.
- Wire Tub Coil Dispenser – Spins 360° so you can pull cable in any direction without repositioning, ideal for feeding multiple circuits from one spot.
- Auger Bits – Heat-treated high-carbon steel bits drill clean holes through studs (and stray nails) for running your branch circuits fast.Now for Lighting!
Here are your priorities for rough-in and installation:
- Pot lights
- Ceiling fixtures
- Vanity lights
- Exterior lights
- Under-cabinet lighting
Consider 3-way switching, 4-way switching, dimmers, smart controls if it’s a smart house.
Cut clean and perfectly centered:
- Driller’s Dust Bowl – Compresses against the ceiling to trap dust and debris while cutting pot light holes overhead. Works with hole saws up to 8″.
- Round Multi-Tool Hole Saw – Clips onto your oscillating multi-tool for clean, arbor-free pot light cuts without risking nearby wires.
- Laser Buddy – Magnetic template aligns with your plumb laser for perfectly centered 3″, 4″, and 6″ recessed light installs, no measuring needed.
Bringing It All Home to the Panel
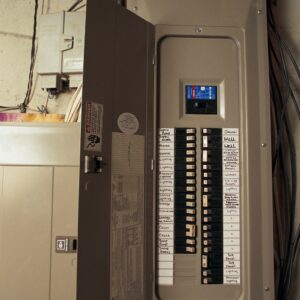 Bring All Circuits to Panel Organize:
- Neatly bundled conductors
- Proper connectors
- Correct cable support
Keep the shavings out:
- Chip Catcher – Magnetic clamp catches metal shavings as you drill the panel, keeping breakers and terminal blocks free of debris.
- Dirt Bag – Pairs with the Chip Catcher to catch what it misses, keeping metal shavings out of your panel install.
That’s a wrap on Part 1. Laura took us from job evaluation through panel rough-in, and it’s a solid reminder of how much groundwork goes in before trim day. Whether you’re resi through and through or making the same commercial-to-resi jump she is, we’d love to hear how your process compares. Drop your take in the comments. Part 2 lands next month with panel finish and testing.
Make sure to follow @volts.tats.and.hardhats for more!

